Support our educational content for free when you buy through links on our site. Learn more
🛠️ 5 Essential Digital Piano Maintenance and Repair Tips (2026)

Most digital piano “failures” are actually just dirty sensors or outdated firmware, meaning you can fix 90% of common issues yourself without spending a dime on a technician. By mastering these Digital Piano Maintenance and Repair Tips, you can extend the life of your instrument by years and avoid the frustration of a silent keyboard.
We once watched a terrified student bring in a “dead” Yamaha Clavinova that had cost them thousands, only to discover a single hair was jaming the keybed sensor. A quick blast of compressed air and a $5 can of contact cleaner later, the piano was singing again. It’s a harsh reality that digital pianos, unlike their acoustic ancestors, are essentially sophisticated computers; they don’t just wear out from use, they succumb to dust, humidity, and software glitches.
Did you know that the average lifespan of a digital piano is often cut short not by mechanical failure, but by power supply issues or coroded contacts that could have been prevented with simple care? Understanding the difference between a software glitch and a hardware failure is the first step to becoming your own instrument’s best mechanic.
Key Takeaways
- Prevention is cheaper than repair: Regular cleaning of keybeds and sensors prevents 80% of common “dead key” issues.
- Know your limits: While sticky keys and dusty sensors are DIY-friendly, circuit board failures and water damage require professional intervention.
- Environment matters: Maintaining 40-60% humidity and avoiding direct sunlight can double the lifespan of your instrument’s internal components.
- Software saves the day: Always check for firmware updates before assuming a hardware malfunction is the cause of strange behavior.
Table of Contents
- ⚡️ Quick Tips and Facts
- 🕰️ A Brief History of Digital Piano Evolution and Durability
- 🛠️ Essential Digital Piano Maintenance: Keeping Your Keys in Top Shape
- 1. Cleaning Keys and Keybeds Without Causing Damage
- 2. Dusting Internal Components and Preventing Debris Buildup
- 3. Managing Humidity and Temperature for Longevity
- 4. Cable Management and Connector Care
- 5. Firmware Updates and Software Optimization
- 🔧 Common Digital Piano Repair Issues and DIY Fixes
- 1. Fixing Sticky or Unresponsive Keys
- 2. Troubleshooting Noisy Pedals and Switches
- 3. Resolving Audio Output Distortion and Speaker Problems
- 4. Addressing Power Supply Failures and Boot Lops
- 5. Calibrating Velocity Sensors and Touch Sensitivity
- 🔌 When to Call a Pro: Recognizing Complex Circuit Board and Sensor Failures
- 🧰 The Ultimate Digital Piano Repair Toolkit: What You Actually Need
- 🏭 Brand-Specific Maintenance Nuances: Yamaha, Roland, Kawai, and Casio
- 💡 Quick Tips and Facts
- 🏁 Conclusion
- 🔗 Recommended Links
- ❓ FAQ
- 📚 Reference Links
⚡️ Quick Tips and Facts
Before we grab our screwdrivers and dive into the guts of your instrument, let’s hit the pause button on panic. You might be staring at a sticky key or a dead speaker thinking, “Is this the end of my musical journey?” Spoiler alert: It’s probably not.
Here are the golden rules we’ve learned from years of tinkering in the workshop:
- Digital pianos are computers with keys. 🖥️🎹 Unlike their acoustic cousins, which are mechanical marvels of wood and felt, your digital piano is essentially a sophisticated computer. This means software glitches are just as likely to cause silence as a broken wire.
- The “15-Year Rule” is real. If your digital piano is older than 15 years, finding replacement parts is akin to finding a unicorn. Manufacturers often stop supporting models once they hit this mark.
- Never use Windex on keys. Seriously. Household cleaners contain ammonia and alcohol that can strip the matte finish off synthetic ivory or crack plastic. Stick to damp microfiber cloths.
- Dust is the enemy. It’s not just annoying; it’s conductive. Dust buildup on the PCB (Printed Circuit Board) can cause phantom notes or total failure.
- Factory resets save lives. Before you assume a key is broken, try a factory reset. It’s the digital equivalent of turning it off and on again.
For a deeper dive into how different brands stack up against these common issues, check out our comprehensive Digital Piano Brands Comparison at https://www.pianobrands.org/digital-piano-brands-comparison/.
🕰️ A Brief History of Digital Piano Evolution and Durability

To understand how to fix a digital piano, you have to understand what you’re actually fixing. The journey from the clunky, 8-bit sounds of the 1970s to the hyper-realistic weighted actions of today is a story of rapid technological obsolescence.
In the early days, companies like Casio and Yamaha were experimenting with simple sampling. These instruments were built like tanks but sounded like robots. Fast forward to the 20s, and we saw the introduction of graded hammer actions and polyphonic sampling, which required much more complex internal circuitry.
The Shift from Mechanical to Electronic Reliability
Acoustic pianos can last 10 years with proper care because they are purely mechanical. Digital pianos, however, rely on:
- Sensors: Optical or rubber contacts that detect key presses.
- Sound Engines: Chips that process audio.
- Power Supplies: Often the first point of failure.
As noted by experts at More Piano, “Digital pianos are computers at heart.” This quote perfectly encapsulates the durability paradox: they offer incredible features but suffer from the same lifespan limitations as your laptop or smartphone.
Did you know? The first commercially successful digital piano, the Yamaha CP-70, was actually an electric grand piano with real strings but electronic pickups. It wasn’t until the Yamaha DX7 in 1983 that true FM synthesis took over, changing the game forever.
If you’re curious about how these brands evolved over the decades, our Piano History section at https://www.pianobrands.org/category/piano-history/ has the full timeline.
🛠️ Essential Digital Piano Maintenance: Keeping Your Keys in Top Shape
Maintenance isn’t just about cleaning; it’s about prevention. A little bit of love goes a long way in extending the life of your Roland, Kawai, or Yamaha digital piano.
1. Cleaning Keys and Keybeds Without Causing Damage
We’ve all been there: you drop a crumb, and suddenly a key sticks. Or worse, you try to clean it with a wet rag and end up with a sticky mess.
The Right Way:
- Power Down: Always unplug the instrument.
- The Cloth: Use a microfiber cloth slightly dampened with water (or a 50/50 mix of water and mild dish soap for stubborn grime).
- The Motion: Wipe from the back of the key to the front. Never wipe side-to-side, as this can push debris under the key.
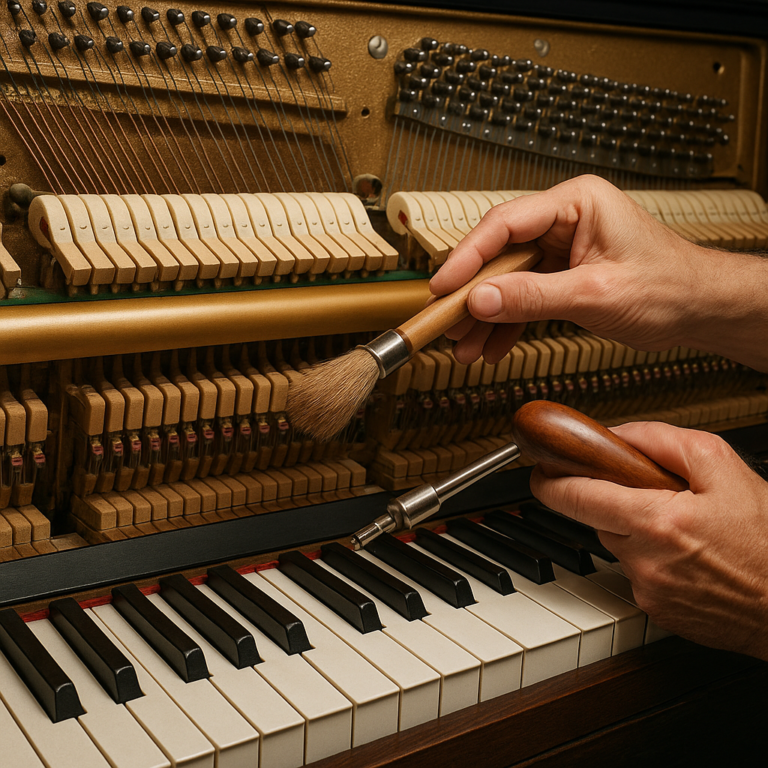
- The Keybed: Use a soft brush or compressed air to clear dust from the gaps between keys.
The Wrong Way:
- ❌ Using alcohol-based cleaners (they melt plastic).
- ❌ Spraying liquid directly onto the keys (it drips into the electronics).
- ❌ Forcing keys off unless you have the specific removal tool for your model.
Pro Tip: If you have a Nord or Kawai with wooden keys, avoid any moisture near the wood grain. A dry cloth is your best friend here.
2. Dusting Internal Components and Preventing Debris Buildup
You might think your piano is sealed tight, but dust finds a way. Over time, dust accumulates on the sensors and circuit boards, causing connectivity issues.
- Compressed Air: This is your best friend. Use short bursts to blow dust out of the keybed and speaker grilles.
- Vacuum with Caution: If you use a vacuum, ensure it’s on a low setting and use a soft brush attachment to avoid static electricity, which can fry sensitive components.
3. Managing Humidity and Temperature for Longevity
Digital pianos are sensitive to extreme environments.
- Ideal Range: 40% to 60% relative humidity.
- The Danger: High humidity can cause corrosion on contacts; low humidity can make plastic brittle.
- Solution: Use a dehumidifier in damp basements or a humidifier in dry winter rooms. Avoid placing your piano near radiators, air conditioners, or direct sunlight.
4. Cable Management and Connector Care
Cables are the lifelines of your digital piano. Frayed power cords or loose MIDI cables are common culprits for “ghost notes” or total silence.
- Inspect Regularly: Check for fraying or bent pins.
- Unplug by the Plug: Never yank the cord by the wire; always grip the connector.
- Organize: Use cable ties to prevent tangling and stress on the ports.
5. Firmware Updates and Software Optimization
Just like your phone, your digital piano needs updates. Manufacturers often release firmware to fix bugs, improve touch sensitivity, or add new sounds.
- Check the Manual: Find the “Firmware Update” section in your user guide.
- Use a Computer: Most updates require a USB connection to a PC or Mac.
- Backup First: Never update firmware without backing up your user data (recordings, custom settings). A power outage during an update can brick your instrument.
For more on choosing the right instrument to begin with, visit our Digital Pianos category at https://www.pianobrands.org/category/digital-pianos/.
🔧 Common Digital Piano Repair Issues and DIY Fixes
Okay, the dust is gone, the keys are clean, but something still feels “off.” Maybe a key is sticking, or the pedal is making a weird noise. Don’t panic yet. Here are the most common issues and how you can fix them yourself.
1. Fixing Sticky or Unresponsive Keys
This is the #1 complaint we hear. A key that doesn’t return to its resting position or doesn’t register a press.
Diagnosis:
- Is it one key or all of them?
- Does it feel physically stuck, or does it move but make no sound?
The Fix:
- Compressed Air: Blast the keybed with compressed air. Often, a tiny crumb or hair is the culprit.
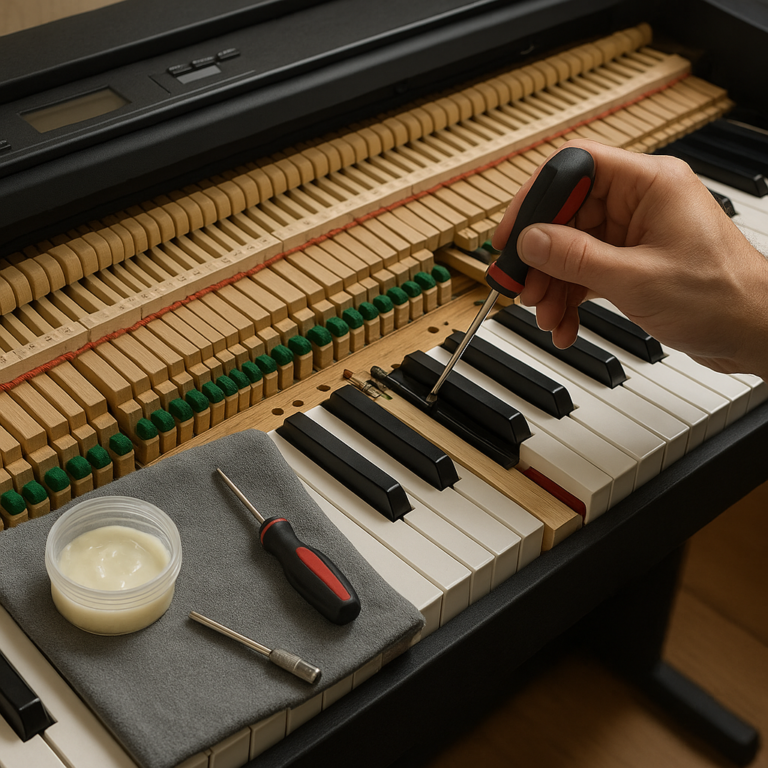
- Remove the Key: If you’re brave, remove the key. Warning: Key removal mechanisms vary wildly. Yamaha often uses a simple lift-and-pull, while Roland and Kawai may require removing the entire top panel. Always consult your service manual first.
- Clean the Sensor: Once the key is out, clean the rubber contact pad and the sensor on the PCB with isopropyl alcohol (90%+). Let it dry completely before reasembling.
- Replace the Key: If the key is physically cracked or the rubber pad is worn out, you’ll need a replacement. Note that keys are rarely interchangeable between models, even within the same brand.
2. Troubleshooting Noisy Pedals and Switches
A squeaky sustain pedal can ruin a recording session.
The Fix:
- Lubrication: Apply a tiny drop of silicone-based lubricant (not WD-40!) to the pivot points of the pedal mechanism.
- Check the Switch: If the pedal is making a “click” sound but not sustaining, the internal switch might be dirty. Clean it with contact cleaner.
- Adjust the Position: Sometimes the pedal just needs to be repositioned on the floor to align with the piano’s switch.
3. Resolving Audio Output Distortion and Speaker Problems
Your sound is crackling, or one speaker is dead.
The Fix:
- Check Connections: Ensure the audio cable is fully seated.
- Test with Headphones: If the sound is clear through headphones but distorted through speakers, the issue is likely the amplifier or speakers.
- Clean the Grille: Dust in the speaker grille can cause rattling.
- Internal Check: If you’re comfortable opening the case, check for loose speaker wires.
4. Addressing Power Supply Failures and Boot Lops
The piano won’t turn on, or it keeps restarting.
The Fix:
- The Lamp Test: Plug a lamp into the same outlet. If the lamp doesn’t work, it’s your outlet, not the piano.
- Check the Brick: Inspect the power adapter for frayed wires or burn marks.
- Factory Reset: If the piano turns on but acts weird, perform a factory reset. Remember: This erases all user data!
5. Calibrating Velocity Sensors and Touch Sensitivity
Your piano feels too heavy or too light, or the dynamics are inconsistent.
The Fix:
- Calibration Mode: Many modern pianos (like Casio Privia and Yamaha Clavinova) have a built-in calibration mode. Check your manual for the key combination to enter this mode.
- Sensor Cleaning: Sometimes, cleaning the optical sensors (if your piano uses them) resolves sensitivity issues.
🔌 When to Call a Pro: Recognizing Complex Circuit Board and Sensor Failures
We love a good DIY project, but some things are better left to the professionals. If you’ve tried the steps above and the problem persists, it might be time to call in the cavalry.
Signs you need a pro:
- Burning Smell: If you smell burning electronics, unplug immediately. This indicates a short circuit.
- Water Damage: If liquid has spilled inside, do not turn it on. Take it to a pro immediately.
- Complex Circuit Board Issues: If the issue is on the main PCB, you’ll need a technician with soldering skills and diagnostic equipment.
- Obsolete Models: If your piano is over 15 years old, finding a technician who can source parts might be impossible. As the experts say, “Like a computer or television, no digital piano lasts forever.”
🧰 The Ultimate Digital Piano Repair Toolkit: What You Actually Need
You don’t need a full garage to fix a digital piano, but you do need the right tools. Here’s what we keep in our workshop:
| Tool | Purpose | Why You Need It |
|---|---|---|
| Compressed Air Can | Dusting | Removes debris from keybeds and sensors without disassembly. |
| Microfiber Cloths | Cleaning | Lint-free cleaning for keys and screens. |
| Isopropyl Alcohol (90%+) | Contact Cleaning | Evaporates quickly and cleans electrical contacts. |
| Phillips & Flathead Screwdrivers | Disassembly | Essential for opening cases and removing panels. |
| Plastic Spudger | Safe Prying | Prevents scratching plastic casings during disassembly. |
| Multimeter | Diagnostics | Tests power supplies and continuity of cables. |
| Silicone Lubricant | Moving Parts | Lubricates pedals and hinges without attracting dust. |
Pro Tip: Invest in a good quality screwdriver set with magnetic tips. Losing a screw inside a piano is a nightmare you want to avoid!
🏭 Brand-Specific Maintenance Nuances: Yamaha, Roland, Kawai, and Casio
Not all digital pianos are created equal. Each brand has its own quirks when it comes to maintenance and repair.
Yamaha
- Key Action: Yamaha’s GH3 and NWX actions are robust but can be tricky to remove. They often require removing the entire top panel.
- Common Issue: Sticky keys due to dust accumulation in the sensor slots.
- Maintenance Tip: Use compressed air regularly.
Roland
- Key Action: Roland’s PHA-4 and Hybrid Grand actions use a unique escapement mechanism.
- Common Issue: The escapement lever can get stuck if not cleaned.
- Maintenance Tip: Be gentle when removing keys; the mechanism is delicate.
Kawai
- Key Action: Kawai’s RHIII and Grand Feel actions use wooden keys and a hammer mechanism similar to acoustics.
- Common Issue: Wooden keys can warp in high humidity.
- Maintenance Tip: Maintain strict humidity control.
Casio
- Key Action: Casio’s Tri-Sensor Scaled Hammer Action is known for being lightweight.
- Common Issue: Sensor pads can wear out faster than other brands.
- Maintenance Tip: Check the firmware regularly for touch sensitivity updates.
For a detailed comparison of these brands, visit our Piano Comparison section at https://www.pianobrands.org/category/piano-comparison/.
Conclusion

So, there you have it! From the dusty keybeds of a 20-year-old Casio to the sleek, high-tech sensors of a modern Yamaha, digital piano maintenance is a mix of old-school cleaning and new-school troubleshooting.
We started this journey wondering if that sticky key was a death sentence for your instrument. The answer? Almost certainly not. With a little compressed air, some isopropyl alcohol, and a bit of patience, you can breathe new life into your digital piano.
However, remember the 15-Year Rule. If your instrument is ancient and parts are scarce, sometimes the most loving thing you can do is let it retire gracefully or find a new home where it can be enjoyed as a vintage piece.
Our Final Recommendation:
- For Beginners: Stick to regular cleaning and firmware updates. Don’t open the case unless you have to.
- For Enthusiasts: Invest in a good toolkit and learn the basics of sensor cleaning.
- For Vintage Owners: If it’s over 15 years old, consider it a “use it or lose it” situation. Enjoy it while it lasts!
And remember, if you ever feel stuck, the community is there to help. Whether it’s a forum post or a local technician, you’re never alone in this.
🔗 Recommended Links
👉 Shop Digital Pianos on:
- Yamaha: Amazon Search | Sweetwater Search | Yamaha Official
- Roland: Amazon Search | Musician’s Friend Search | Roland Official
- Kawai: Amazon Search | Sweetwater Search | Kawai Official
- Casio: Amazon Search | Musician’s Friend Search | Casio Official
Recommended Books:
- The Piano Book by Larry Fine (Great for understanding the mechanics of actions)
- Digital Piano Maintenance Guide (Available on Amazon)
❓ FAQ

How often should I clean the keys on my digital piano?
Answer: We recommend a light wipe down after every playing session to remove oils and sweat. A deep clean with a slightly damp cloth should be done once a month, or more frequently if you play often. Don’t forget to use compressed air on the keybed every few months to prevent dust buildup.
Read more about “🎹 10 Essential Digital Piano Accessories and Equipment for 2026”
What are the common signs that a digital piano needs repair?
Answer:
- Sticky or unresponsive keys: Often caused by dirt or worn sensors.
- Noisy pedals: Indicates a need for lubrication or switch replacement.
- Distorted sound: Could be a speaker issue or amplifier failure.
- Power issues: If the piano won’t turn on or keeps resetting, check the power supply first.
- Ghost notes: Keys registering without being pressed, usually a sensor or PCB issue.
Read more about “🎹 How to Maintain Your Digital Piano for Decades (2026)”
Can I use regular household cleaners on my digital piano?
Answer: Absolutely not. Household cleaners like Windex, bleach, or ammonia-based products can damage the plastic, strip the matte finish, and even corrode internal components. Stick to microfiber cloths and isopropyl alcohol for electrical contacts.
Read more about “🎹 What Are the 10 Best Piano Brands for Beginners? (2026)”
How do I troubleshoot unresponsive keys on a digital piano?
Answer:
- Check the power: Ensure the piano is properly plugged in.
- Clean the keybed: Use compressed air to remove debris.
- Remove and clean the key: If comfortable, remove the key and clean the sensor with isopropyl alcohol.
- Factory reset: Try resetting the piano to default settings.
- Check for firmware updates: Sometimes a software glitch causes unresponsiveness.
- Call a pro: If none of these work, the sensor or PCB might be damaged.
Read more about “🎹 7 Best AI-Integrated Piano Brands to Watch in 2026”
📚 Reference Links
- More Piano: Digital Piano Maintenance and Repair Tips
- Yamaha Support: Digital Piano Service & Repair
- Roland Support: Digital Piano Troubleshooting
- Kawai Support: Digital Piano Service
- Casio Support: Digital Piano Help
- Facebook Group Discussion: Help!… anyone with knowledge of digital piano repairs may know a …
- Piano Brands™: Digital Piano Brands Comparison
- Piano Brands™: Digital Pianos Category